Welcome to Logicube’s tutorial on the Falcon-NEO forensic imager. The Falcon-NEO allows you to image directly to or from a network repository using SMB or CIFS protocol, or using iSCSI. Two 10GbE ports provide extremely fast network imaging performance. In this episode we’ll show you how to image from a physical drive connected to the Falcon-NEO, to a network repository, using CIFS protocol. Make sure you have full permissions to the shared resource before attempting to create a network repository on the Falcon-NEO. We strongly suggest that you contact your network administrator to ensure proper permissions have been set up.
We have set up a directory on a computer that is connected to the same network as the Falcon-NEO. By right clicking on the directory and checking the share properties, we can verify that we have full permissions to this share. We’ll now create and mount the repository on the Falcon-NEO.

From the left-side menu, tap on the ‘Manage Repositories’ icon. On the ‘Add/Remove’ tab, you’ll see a list of available repositories, including all drives attached to the Falcon-NEO destination ports, and any network repository. Tap the ‘Add Repository’ button at the bottom of the screen, then tap ‘Name’ to set the name of the repository. Then tap ‘Drive’ to select a network share to set as a repository.
Then tap ‘Network Source’ to select the network source – either LAN1, LAN2, or ‘Any’ – then tap ‘Network Destination’ to enter the network settings. Enter the path of the share; this includes the IP address and share name. Use the forward slash, not the backward slash, when entering the path. Enter the domain of the share, if the shared resource is in a domain; otherwise, use the work group name. Then enter the username that has full permissions, both read and write access, to the share. Then enter the password for the username.

Next tap ‘Role’, and the repository can be set as a source, destination, or both. Once the repository has been set up, it will appear under the repository list. If you would like the repository you have set up to remain configured when the Falcon-NEO is turned off, the changes must be saved and loaded to a profile on the Falcon-NEO. Refer to the users’ manual for instructions on how to do this.
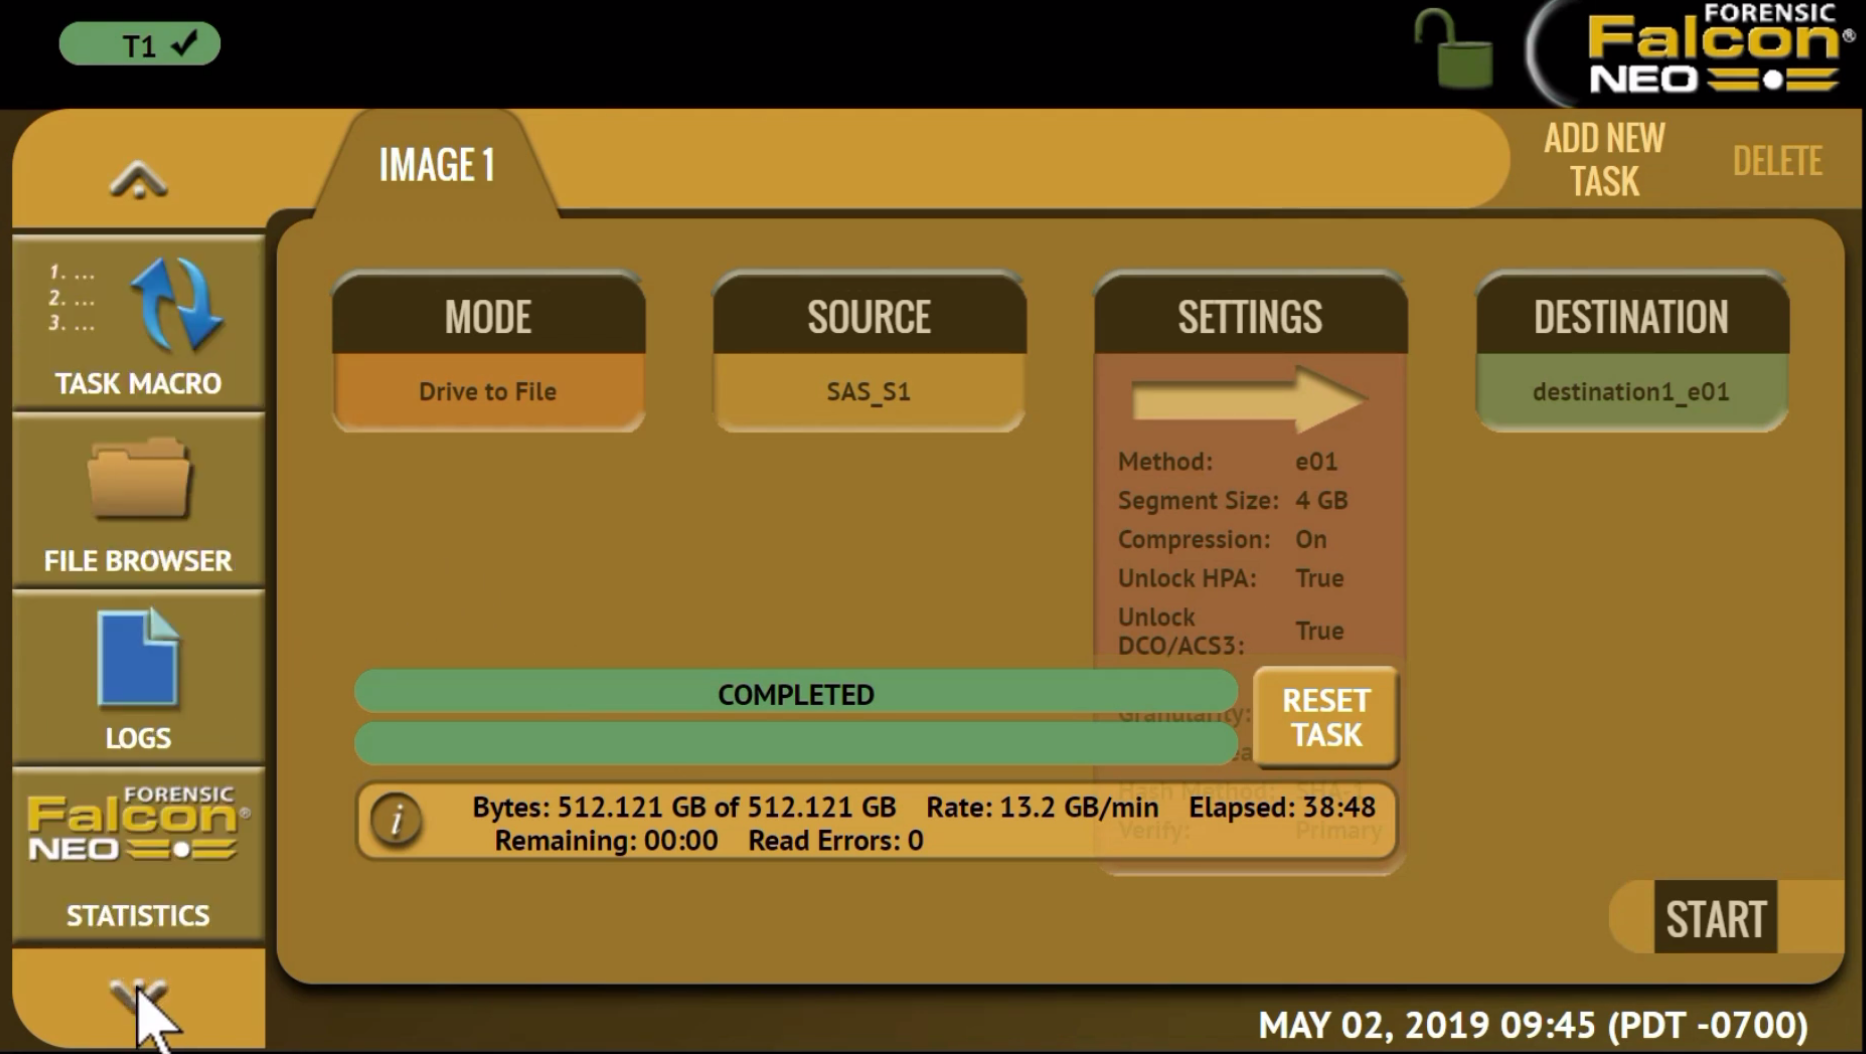
Once a repository has been added, you can use it as a source or destination for any imaging task. For this task, we’ll select the ‘Drive to File’ mode, then we’ll select the source – in this case, we’ll select a hard drive connected to the Falcon-NEO.
Next, choose your settings. Here you can enter a case name and other case identification information such as evidence ID. Then set the imaging method. Here we’ll choose E01, and leave the default setting of 4GB for the segment size and with compression on. You can then choose whether to image HPA and DCO areas of the drive and set the error granularity. Finally, choose the hash method and whether you wish to verify or not.

Then select your destination: in this case, the network repository we just set up. Once all your settings have been chosen, press ‘Start’ and the imaging task will begin.
Upon completion of the imaging task, you can review the log file associated with the task by navigating to the ‘Logs’ icon from the left-side menu bar. The log file includes all of the chosen settings and the file information from the network repository that was captured for this task.
Thank you for your interest in the Falcon-NEO. We hope you found this tutorial informative. To learn more about the Falcon-NEO, visit our website at logicube.com, or contact our sales team at sales@logicube.com.